こんにちは。みみねこです。
年に一度のクリスマスイベント♪子どもがいる家庭ではお家で過ごす方も多いのではないでしょうか。
おうちクリスマスを盛り上げるために、子どもにクリスマスの衣装を着せて家族でお祝いや写真撮影するのも思い出が残って良いですね!
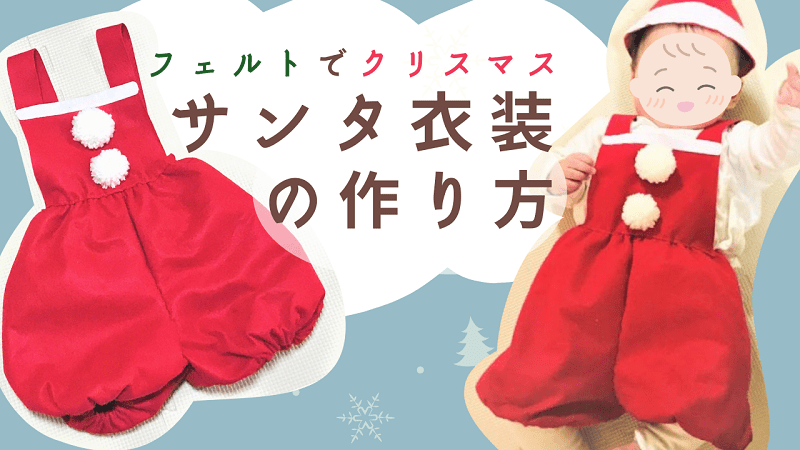
今回はサンタクロースのスタイ衣装を手作りしました。頭にサンタの帽子をかぶせても可愛いですね!少しでも参考になりましたら嬉しいです。
隙間時間でやりましたが、1、2日で簡単にできたので良かったら参考にしてみてください♪
おすすめの道具


材料
基本的な手芸道具(針、はさみ等)は割愛します♪
- フェルト
赤:1~2枚(約70cm×60cm)
白:約20×3cm - 糸
赤、白 - 白の毛糸
- マジックテープやスナップボタンなど、衣装を留めるもの
- 帽子用ゴム
- 布用ボンド(グルーガンも可)
今回は衣装を留めるのに、マジックテープを使いました。縫い付けタイプがおすすめです。
赤フェルトはサイズが80-90の場合1枚で作れますが、ギリギリなので1~2枚と記載しました。
かぼちゃパンツ作成
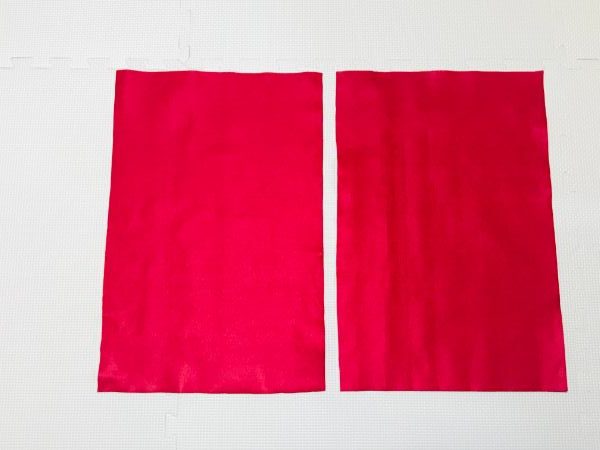
フェルトを切る
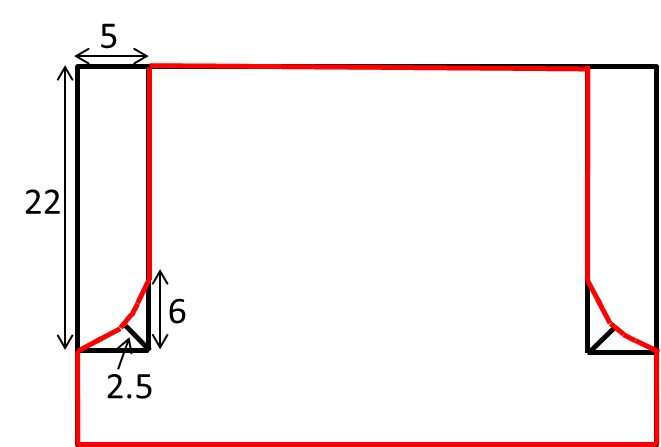
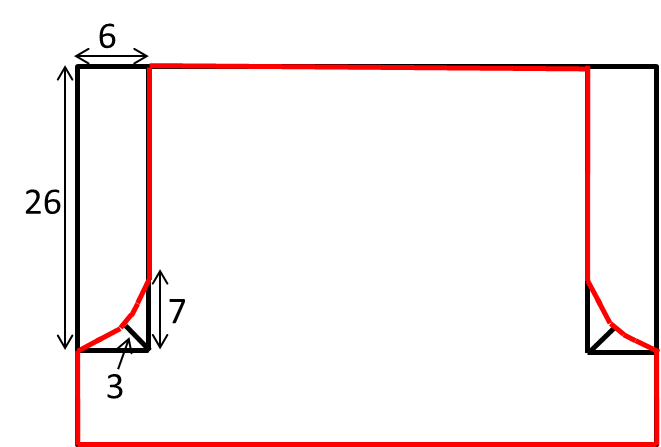
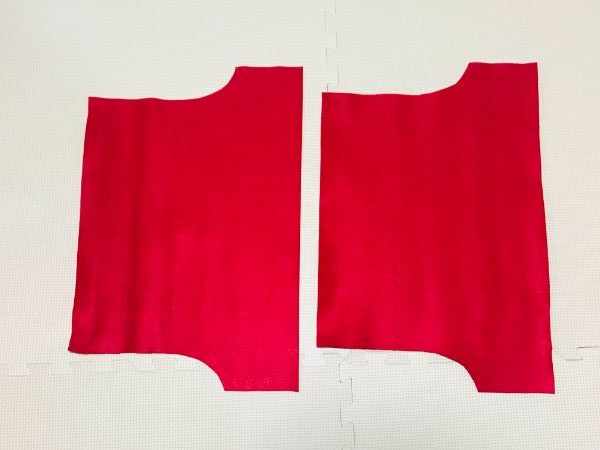
赤フェルトをサイズに応じて2枚切ってください。
- 80-90サイズ
48×32cm - 90-100サイズ
52×35cm - 100-110サイズ
56×38cm
フェルトを横長にして下画像の赤線のように印をつけます。サイズによって寸法を変えているので注意してくださいね♪
また、重ねてフェルトを切るので印をつけるのは左側だけで大丈夫ですよ♪

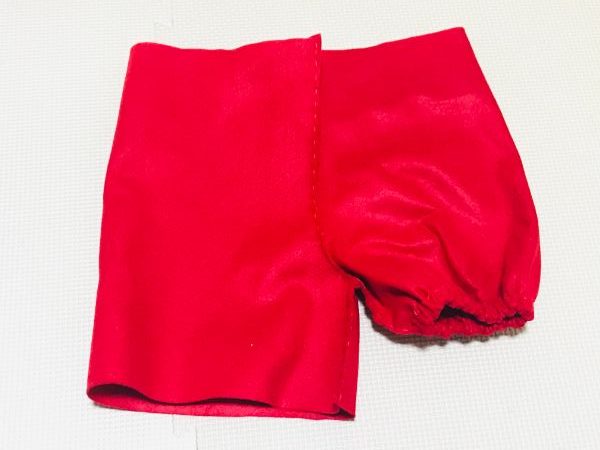
半分に折り、印に沿って重ねたフェルトを切ります。

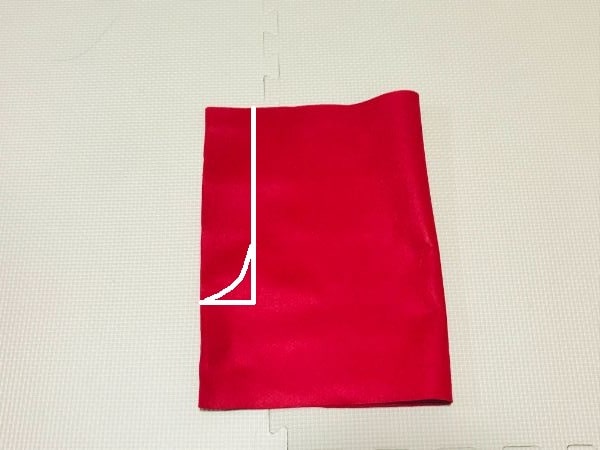
フェルトを広げると、このようになります。
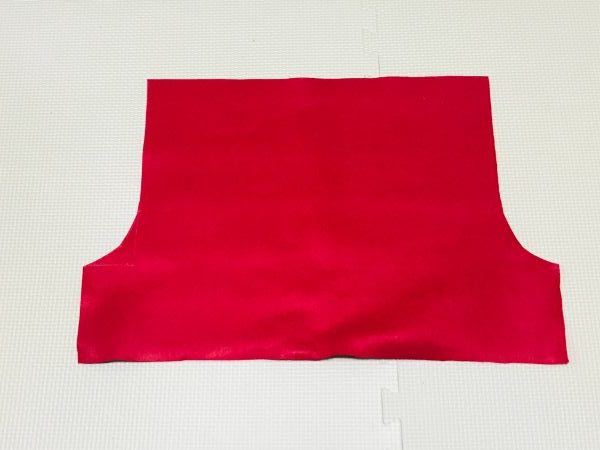
もう一枚も同じように切ります。
縫い合わせる
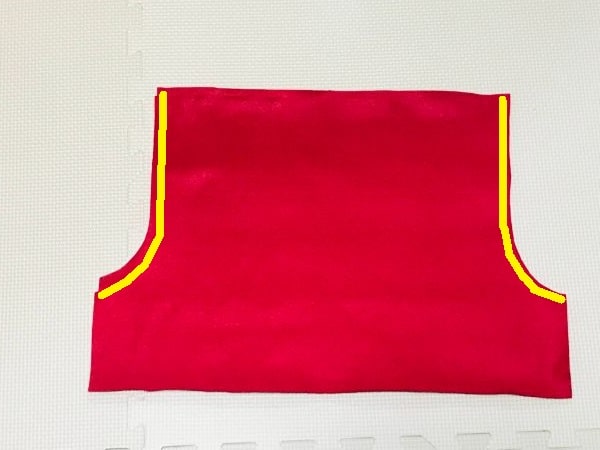
切った2枚のフェルトを重ね画像の黄色線を縫い合わせます。
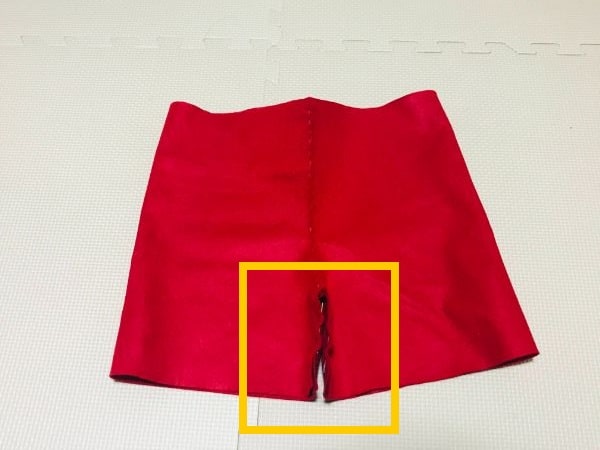
縫い終わったら縫い目を真ん中に持ってきて、股下を縫い合わせます。
縫い合わせるところをクルっとさせ縫い合わせます。
ゴムを通す
足2か所、お腹部分にゴムを通してかぼちゃパンツを完成させます。
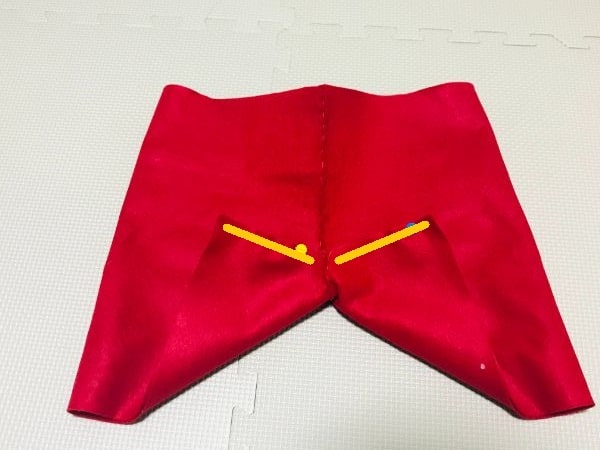
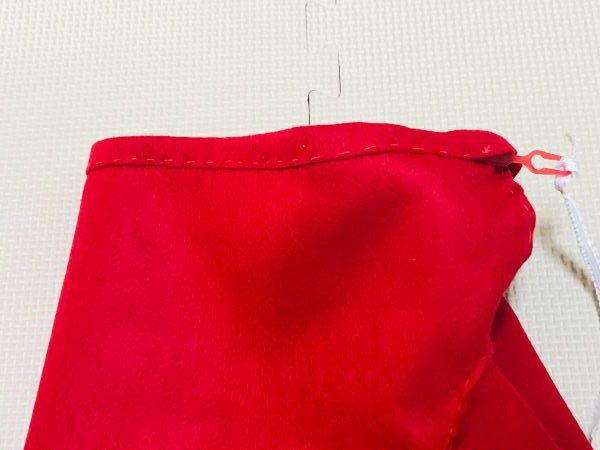
ゴムを通すために足とお腹部分のフェルトを1.5cm程度折り返します。
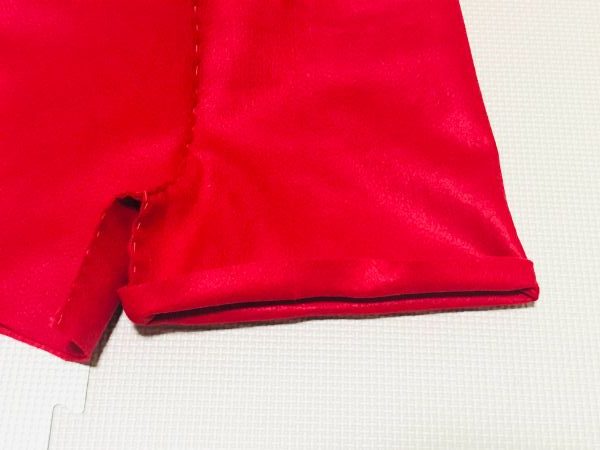
折り返した部分を待ち針で固定して、ゴムを通せるように縫います。
後からゴムを通すので、入れられるように10cm程度は縫わないようにしてください。
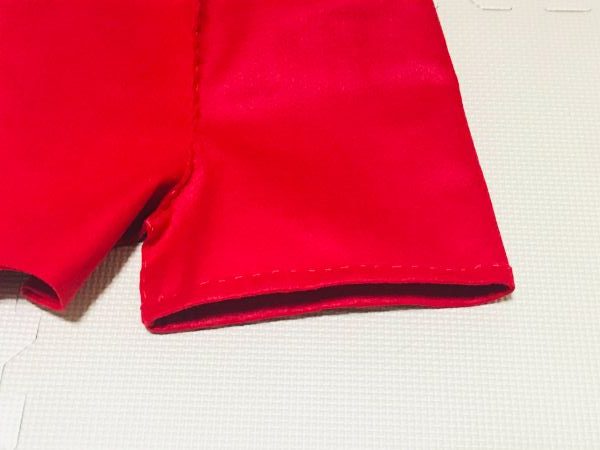
紐通しでゴムを通していきます。紐通しが無ければ安全ピンでも代用可能です。
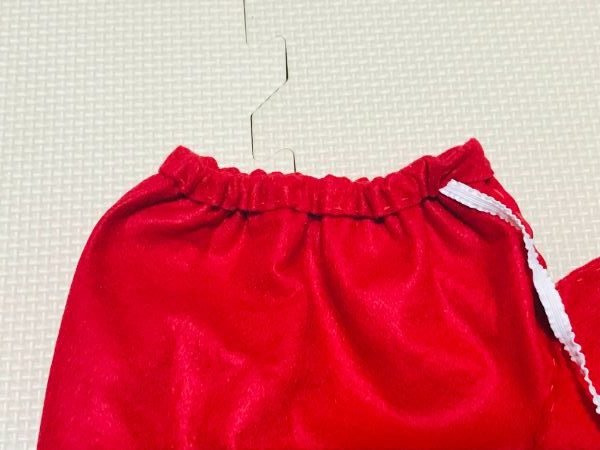
ゴムを1週通したら、しぼませたいところまでぎゅっと引っ張って結んでください。
あまり強くひっぱると千切れたり、足を入れた時に痛いので少し余裕を持たせてください。
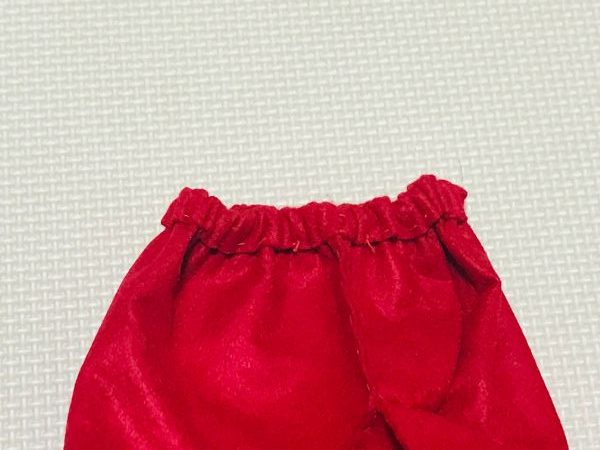
先ほど10cm程度開けておいた、残りのフェルトも縫っていきます。
残りの2か所も同じようにゴムを通してください。

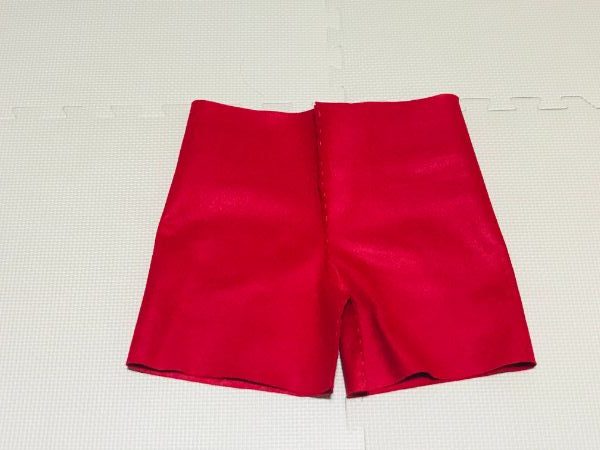
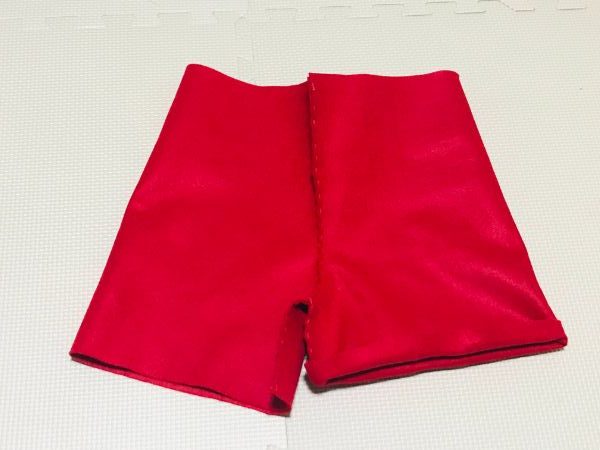
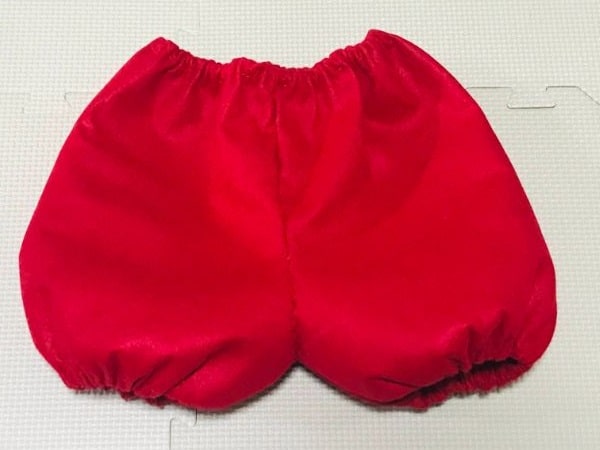
裏返したらかぼちゃパンツの完成です♪
胸や肩のフェルトを付けてサロペットにする
フェルトを切る
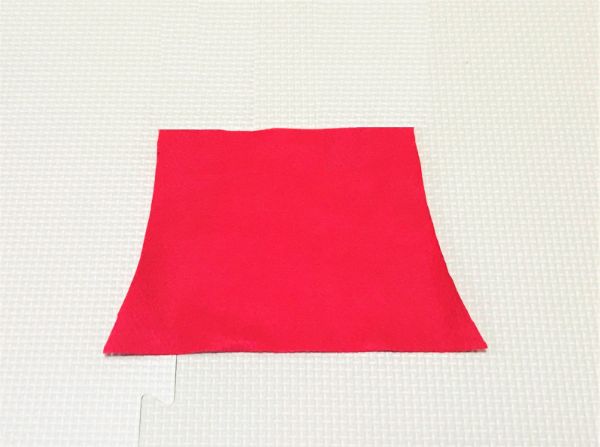
胸元用の赤フェルトを以下のサイズに応じた四角形に切ります。左右はカーブを付けると可愛いですよ♪

- 80-90サイズ
上辺:15cm 下辺:20cm 縦:12cm - 90-100サイズ
上辺:16.5cm 下辺:22cm 縦:13.5cm - 100-110サイズ
上辺:18cm 下辺:24cm 縦:15cm
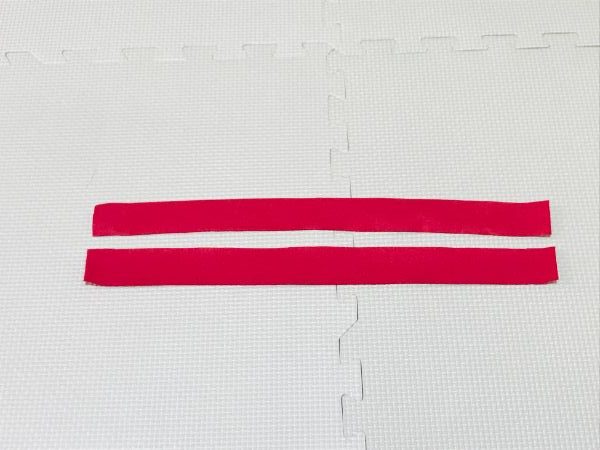
肩紐用の赤フェルトを2枚切ります。
横:3~3.5cm
縦:35~40m
白フェルトを切ります。
横を上辺の長さ
縦を1.5cm
四角形に切り、角を丸くします。

フェルトを飾り付ける
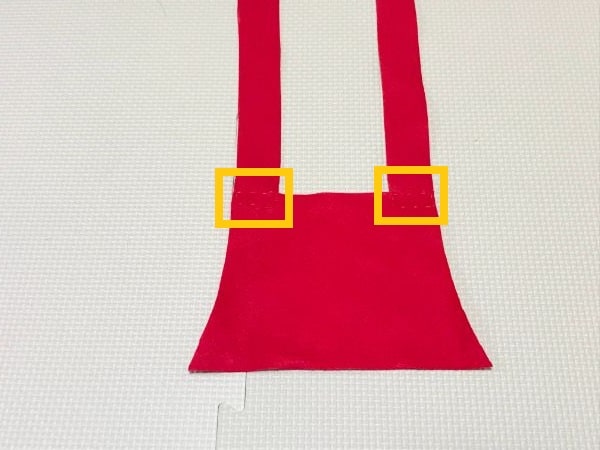
胸元用赤フェルトの画像位置に肩紐用赤フェルトを縫い付けます。
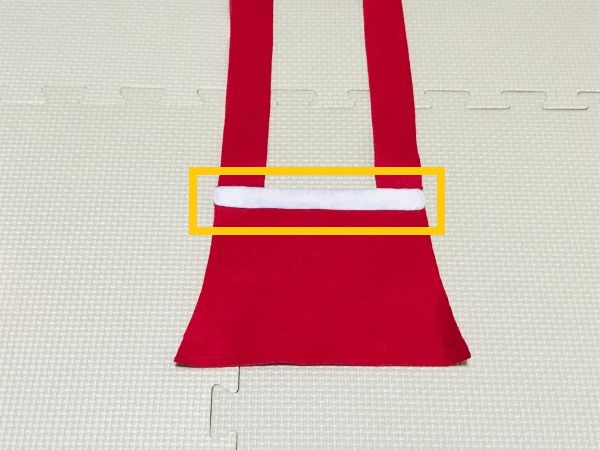
胸元用赤フェルトを裏返して、白フェルトをボンドでつけます。
縫い付けたりグルーガンでつけても良いですよ♪
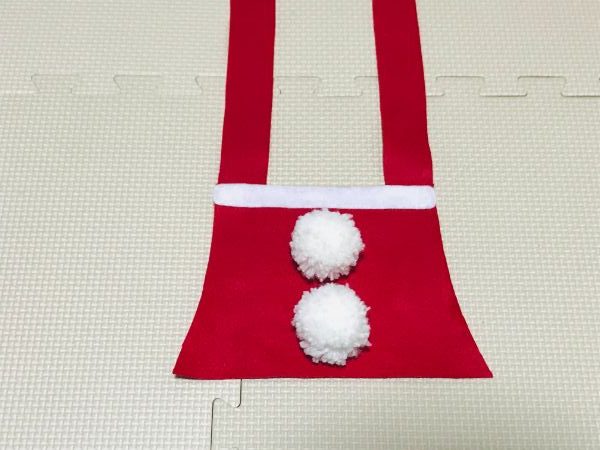
毛糸で作ったポンポンをボンドでつけます。
胸元を縫い付ける
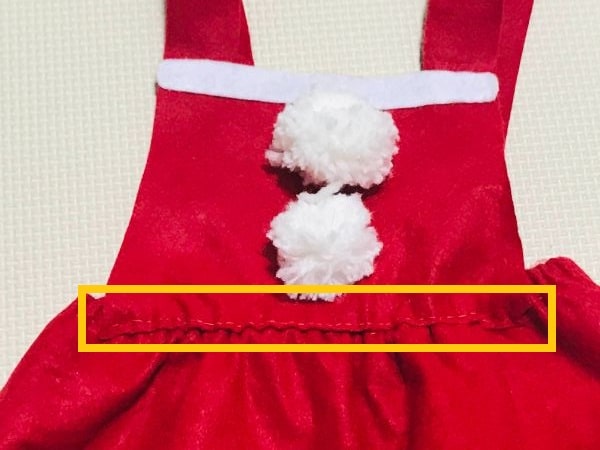
先ほど作った胸元+肩紐フェルトをかぼちゃパンツ上部、1~2cm程度被らせるように置きます。
かぼちゃパンツと切ったフェルトが合わさったところを縫います。
肩紐を付ける
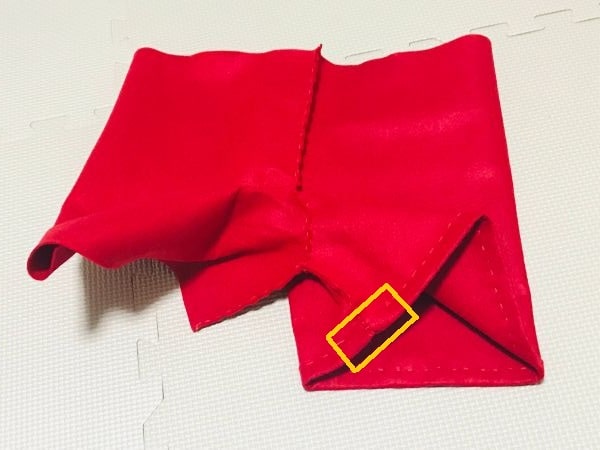
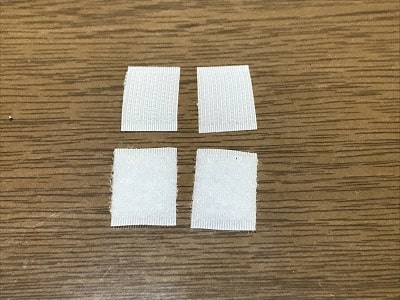
マジックテープを1.5cmの長さで2セット切ります。
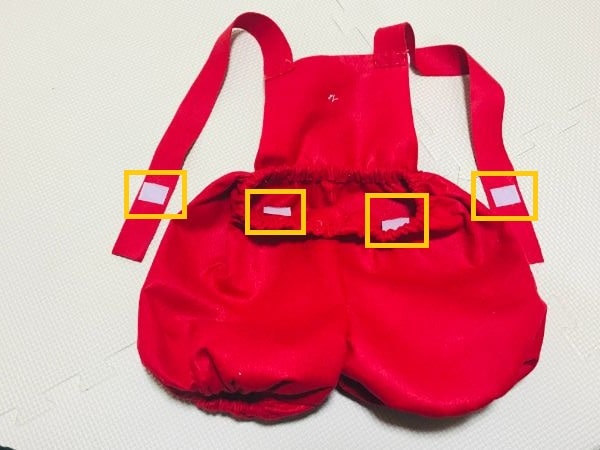
黄色枠にマジックテープを付けます。
・肩紐の端
・かぼちゃパンツの裏生地
それぞれ2か所ずつ
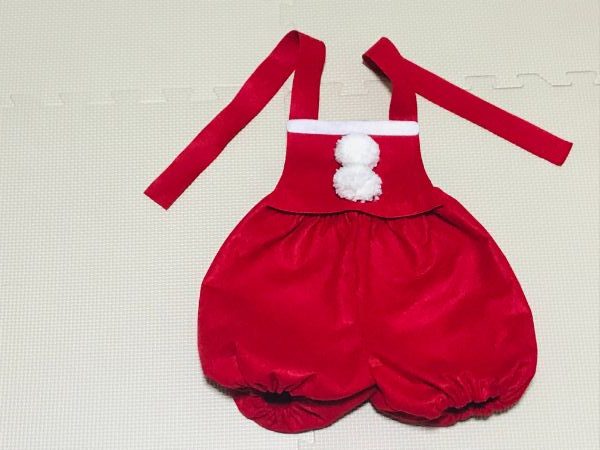
これで完成です!
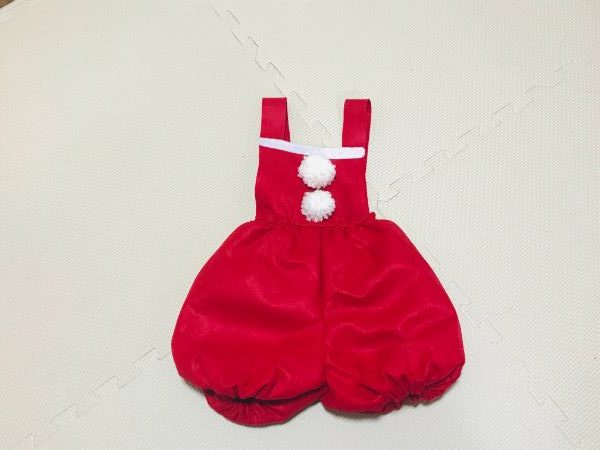
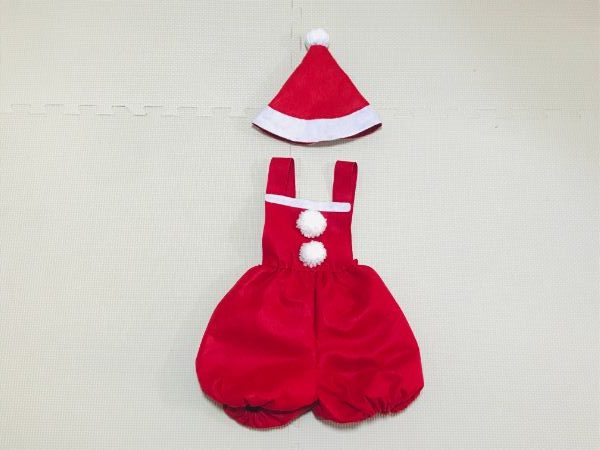
完成
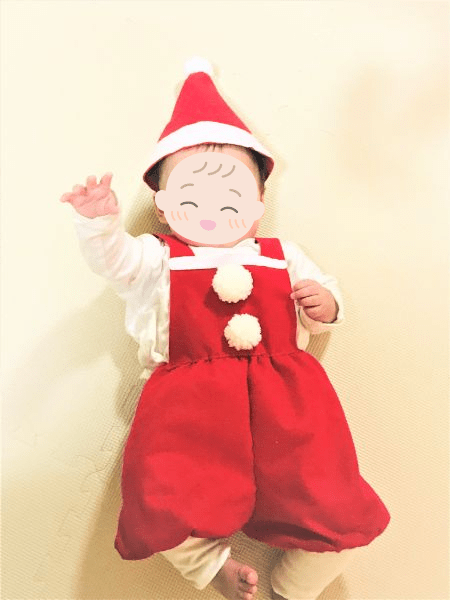
完成品と、実際に子どもに着せた写真がこちらです♪
以前作成したサンタ帽と一緒に写真を撮ってみました。クリスマス感が出て可愛らしいですね!
いかがでしたでしょうか。他にもクリスマス衣装を作っているので良かったら覗いてみてください♪
少しでも参考になればうれしいです!ここまで読んでいただきありがとうございました。