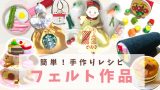
年に一度のクリスマスイベント♪小さな子どもがいる家庭ではお家で過ごす方も多いのではないでしょうか。
クリスマスといえばお菓子の詰め合わせセット!
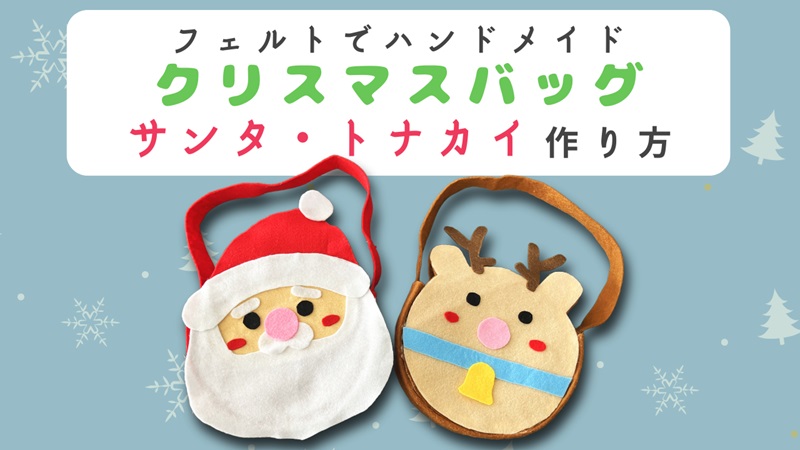
市販のクリスマスブーツもありますが、簡単にフェルトでクリスマスラッピングバッグを手作りしてみましたので、は作り方を紹介していきます。
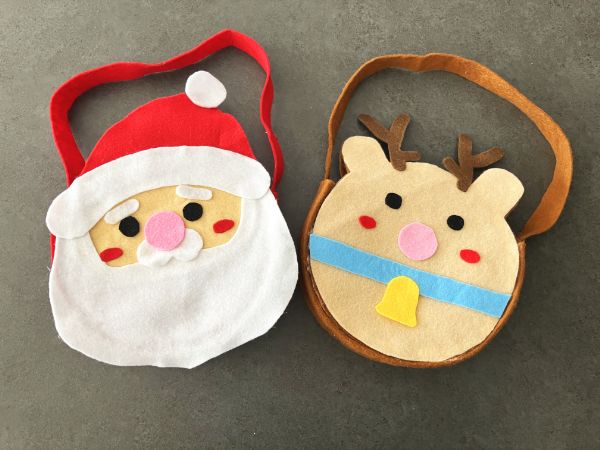
今回はサンタとトナカイの2種類で作ってみました♪
縫わずに簡単に作ることができましたので、良かったら参考にしてみてください♪
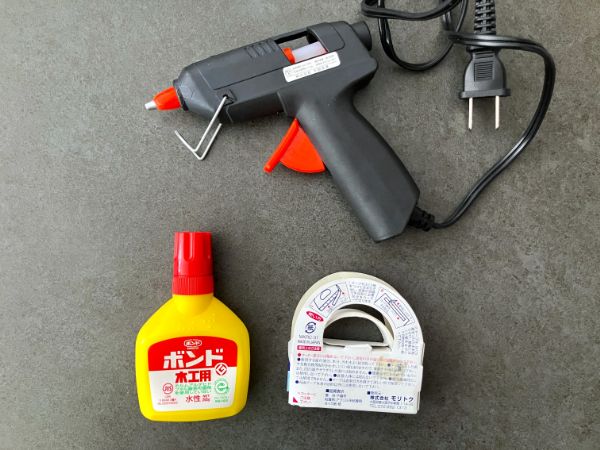
おすすめの道具


材料
基本的な手芸道具や文房具(はさみや針など)は割愛します♪
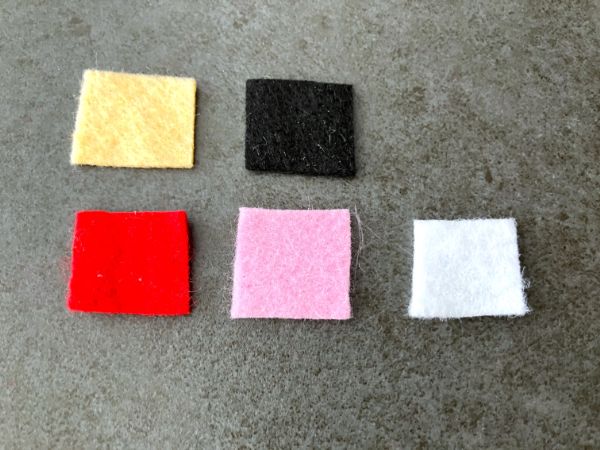
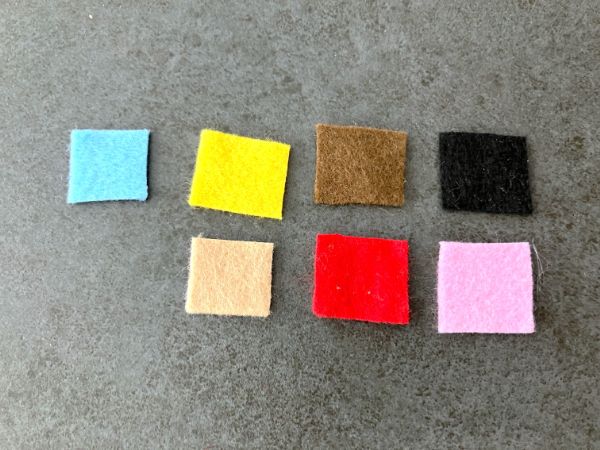
- フェルト
サンタ:赤、ベージュ、白、黒、ピンク
トナカイ:薄茶色、茶色、赤、黄色、黒(水色、ピンク) - グルーガン、ボンド
(布用両面テープもあれば)
青、ピンクのフェルトは赤のフェルトを使用しても大丈夫です!
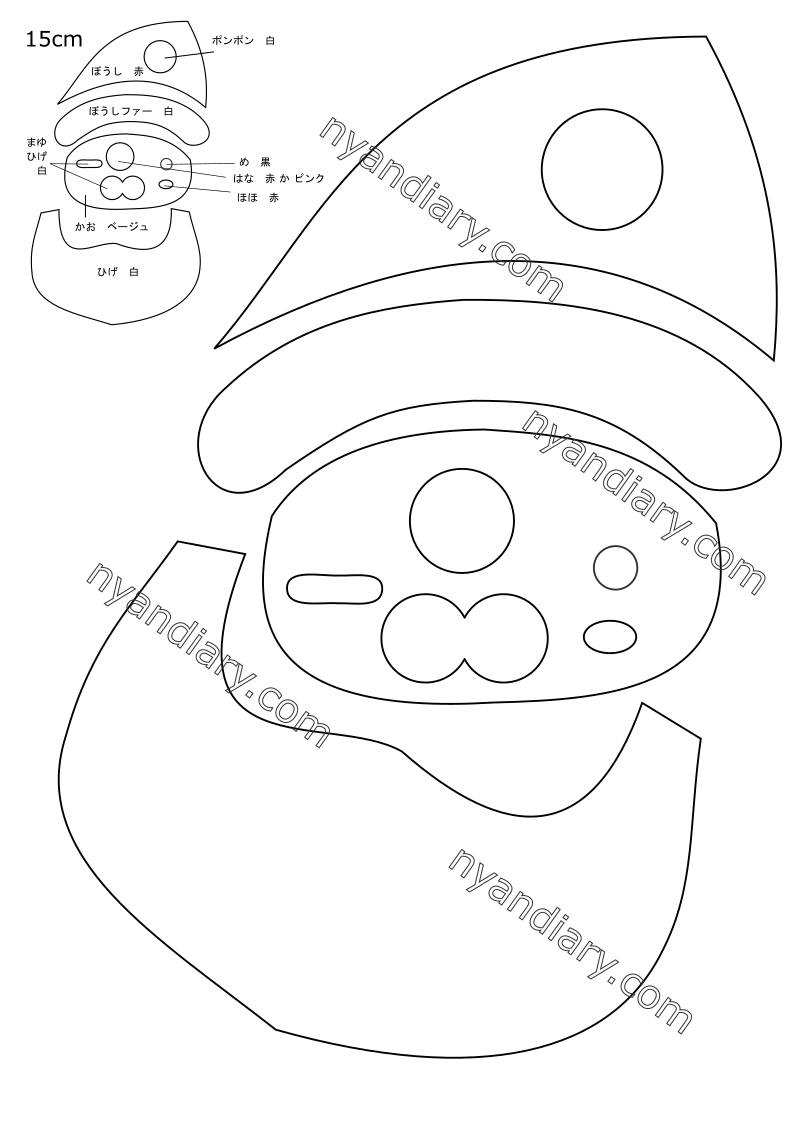
型紙
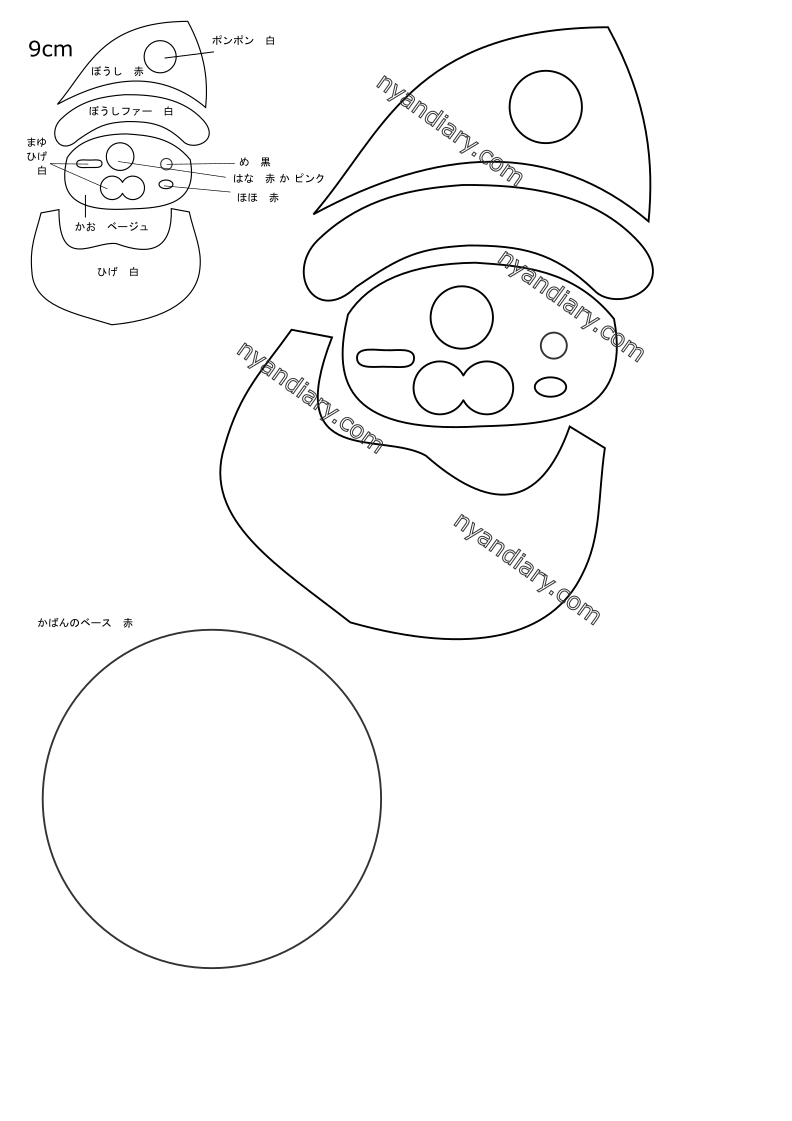
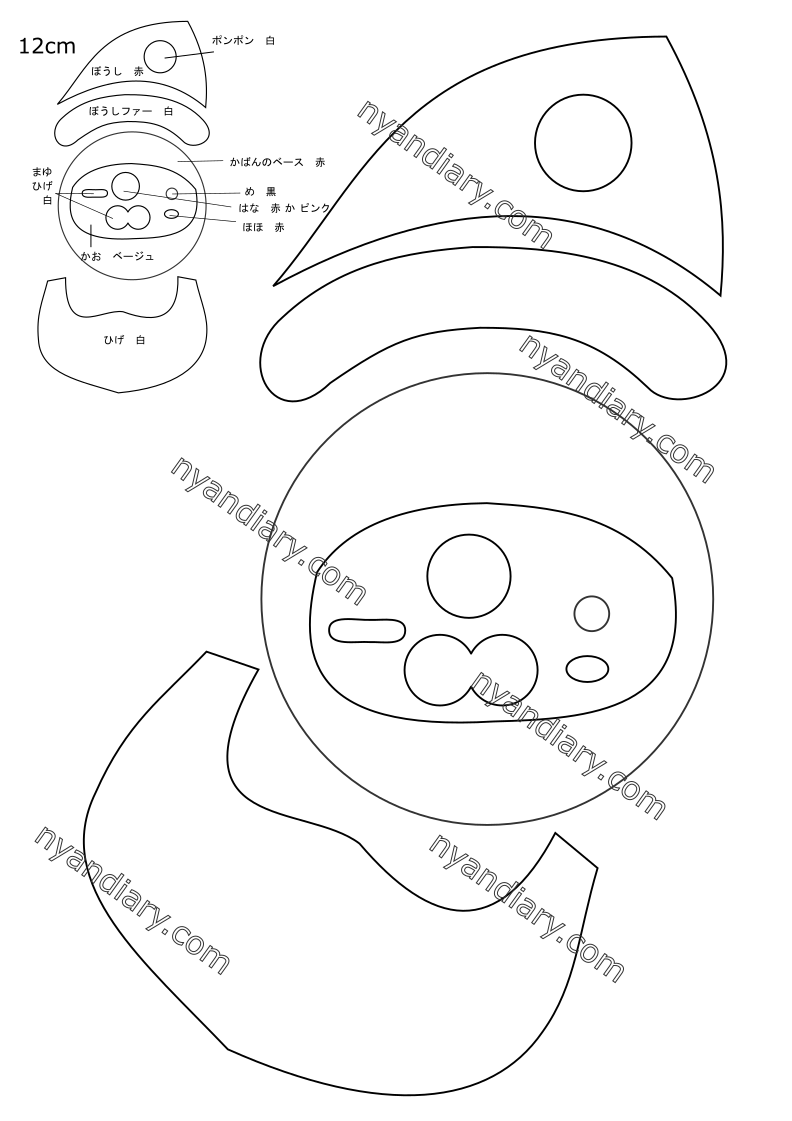
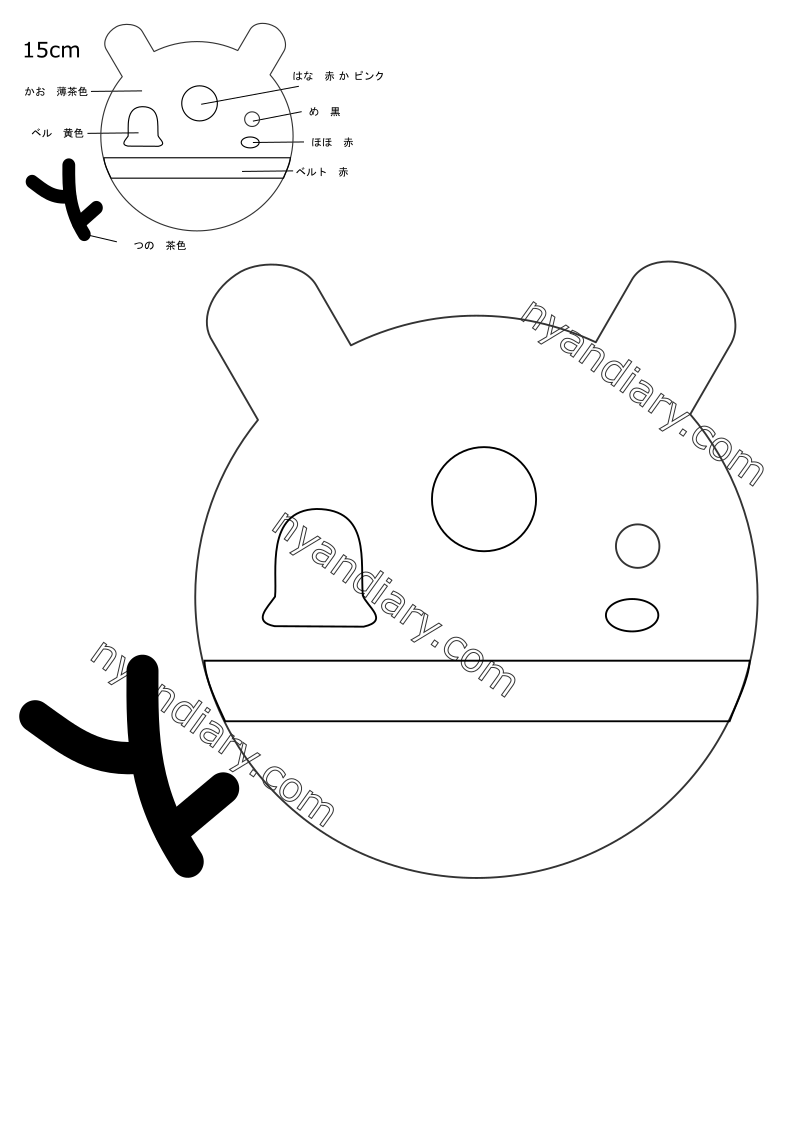
型紙のサイズ
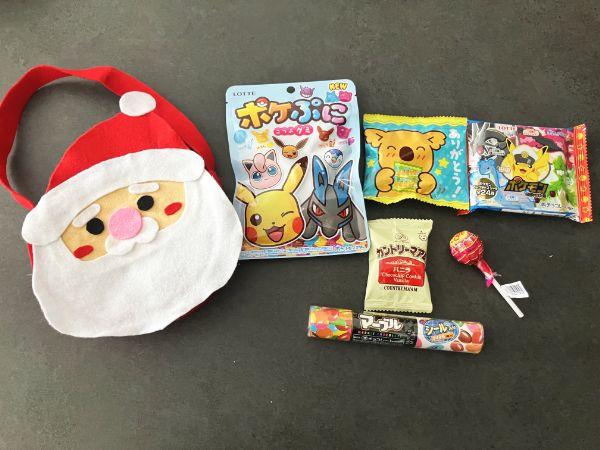
今回作成したサイズは横15cm程度で作り、画像のようなお菓子が入ります
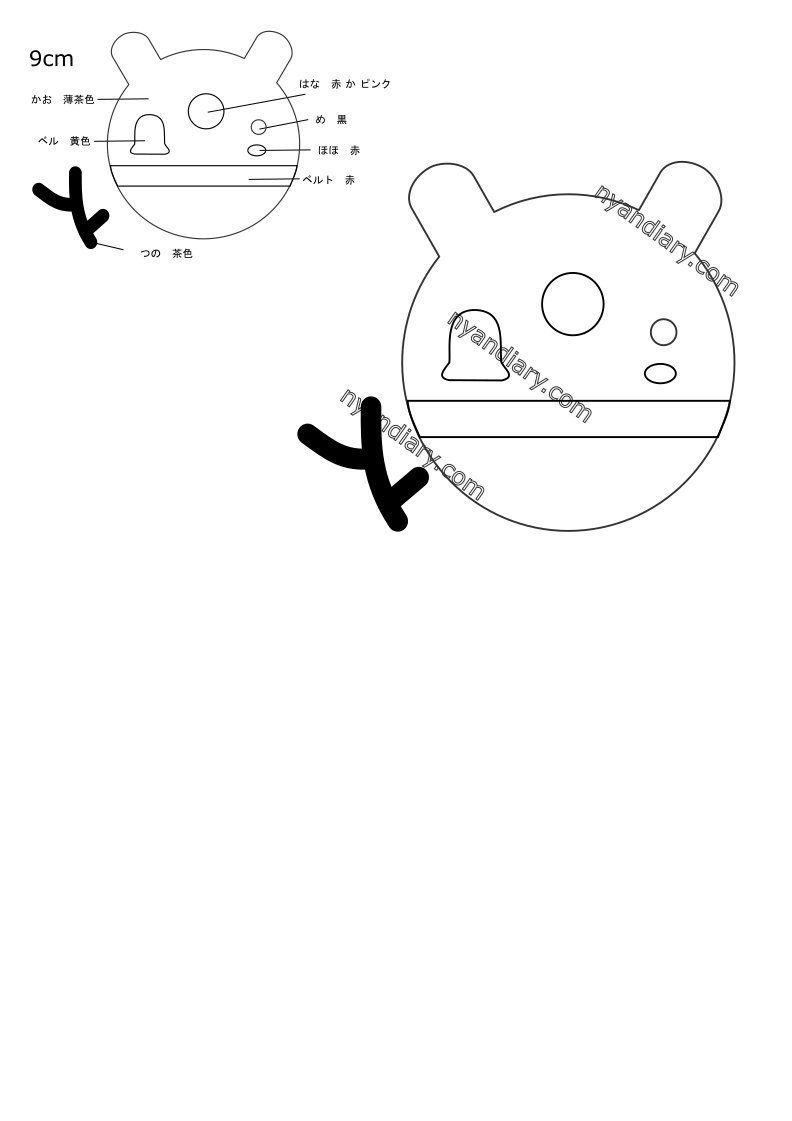
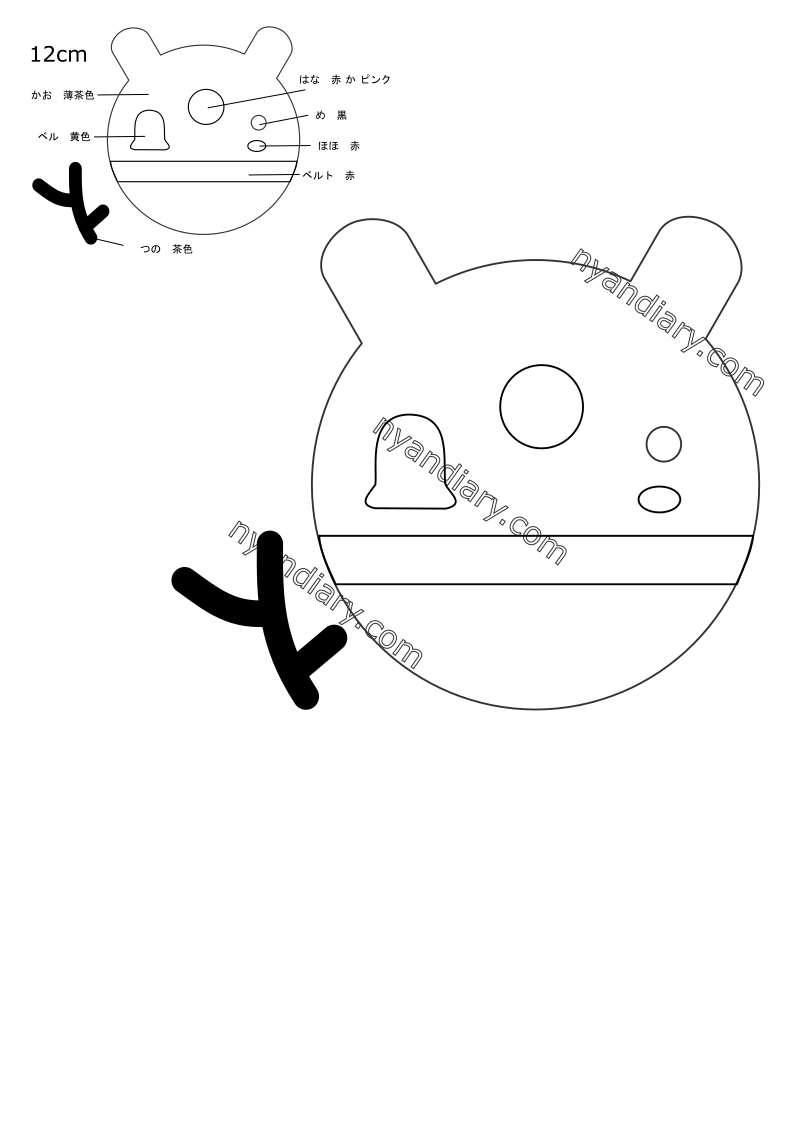
もう少し小さいサイズで作りたい場合は横12cm、9cmの型紙も載せているので参考にしてみてください
型紙
印刷設定には注意してくださいね♪
自動調整:ページに合わせるで印刷してくださいね。
画像をクリック → 右クリック → 「名前を付けて画像を保存…」でそれぞれの画像を保存して
紙に印刷してご利用ください♪
ここからはサンタとトナカイで作り方を別々に紹介していきます。
作り方 サンタ
1.フェルトを切る
型紙に合わせてフェルトを切ります
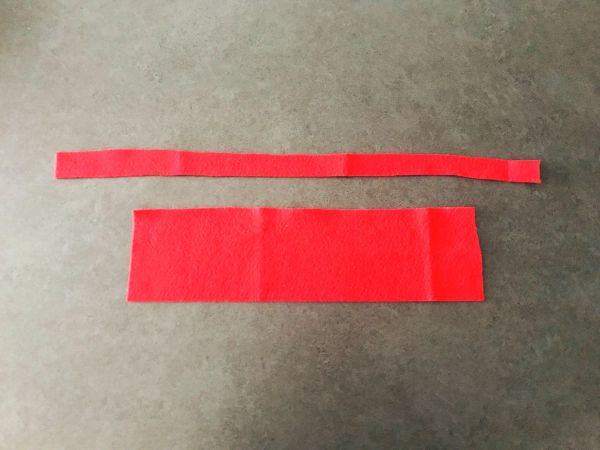
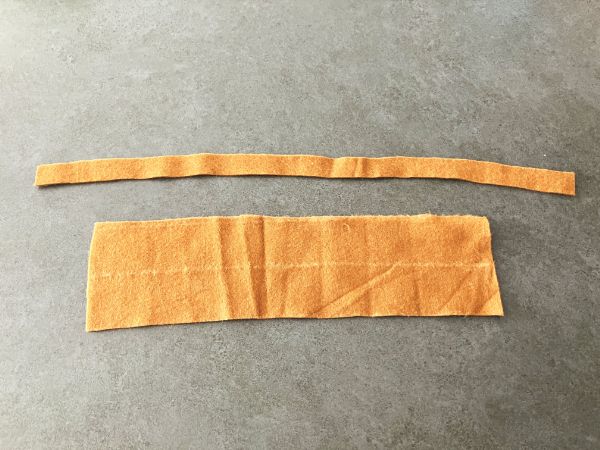
持ち手と側面のフェルトを切ります
持ち手: 2 × 43cm
側面:8 × 30cm
持ち手は頑丈にしたい場合は2枚切って重ねてくっつけてください
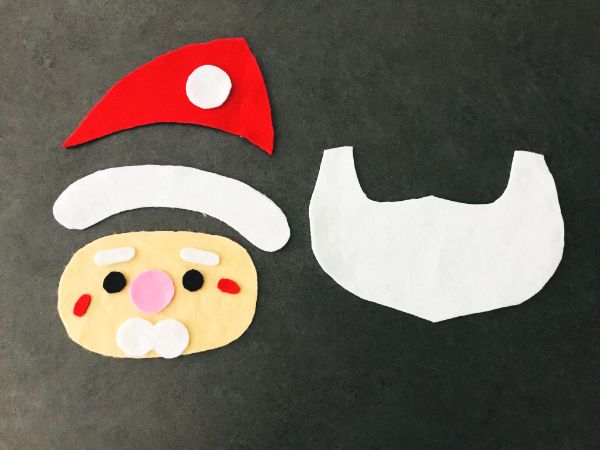
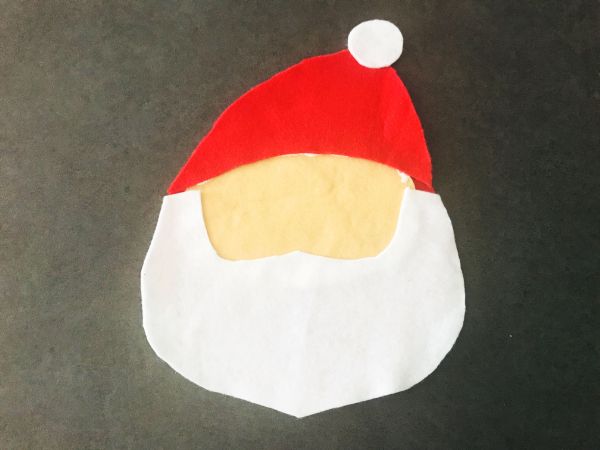
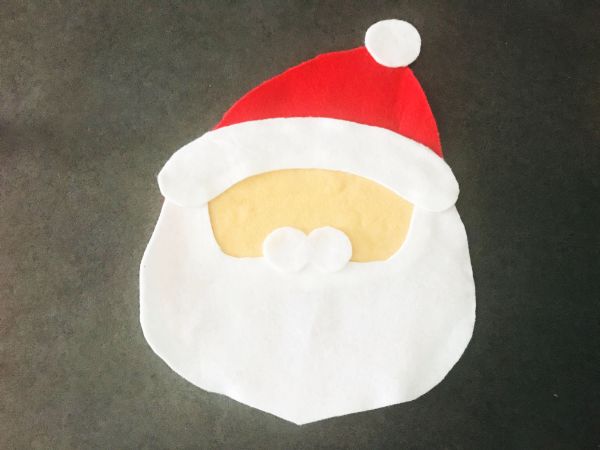
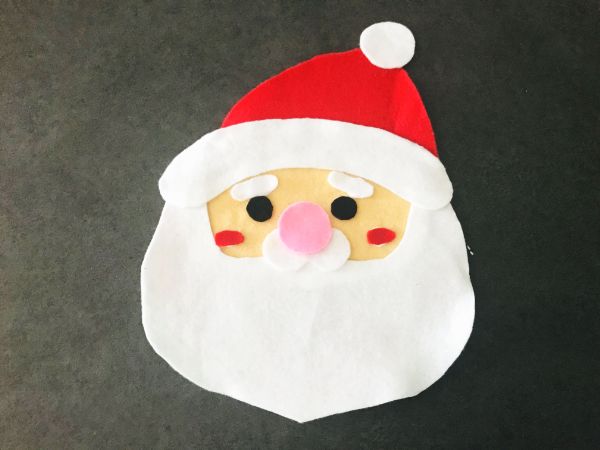
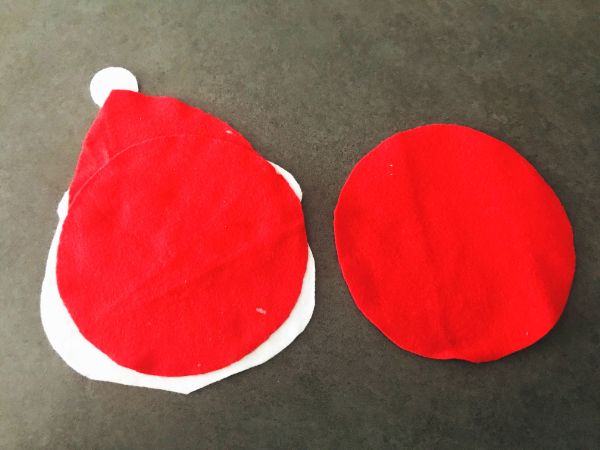
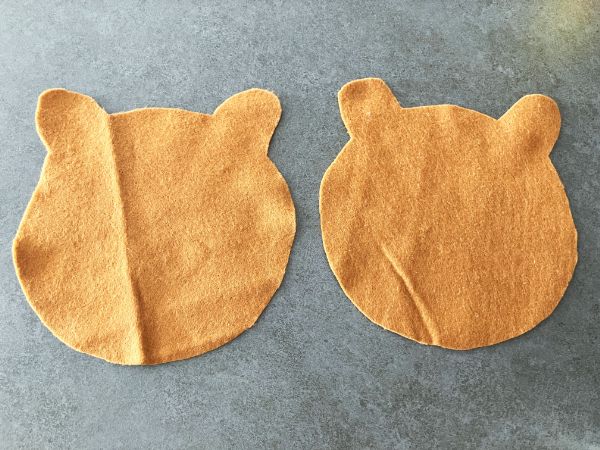
2.顔のフェルトを接着する
布用両面テープ か ボンドがおすすめ!
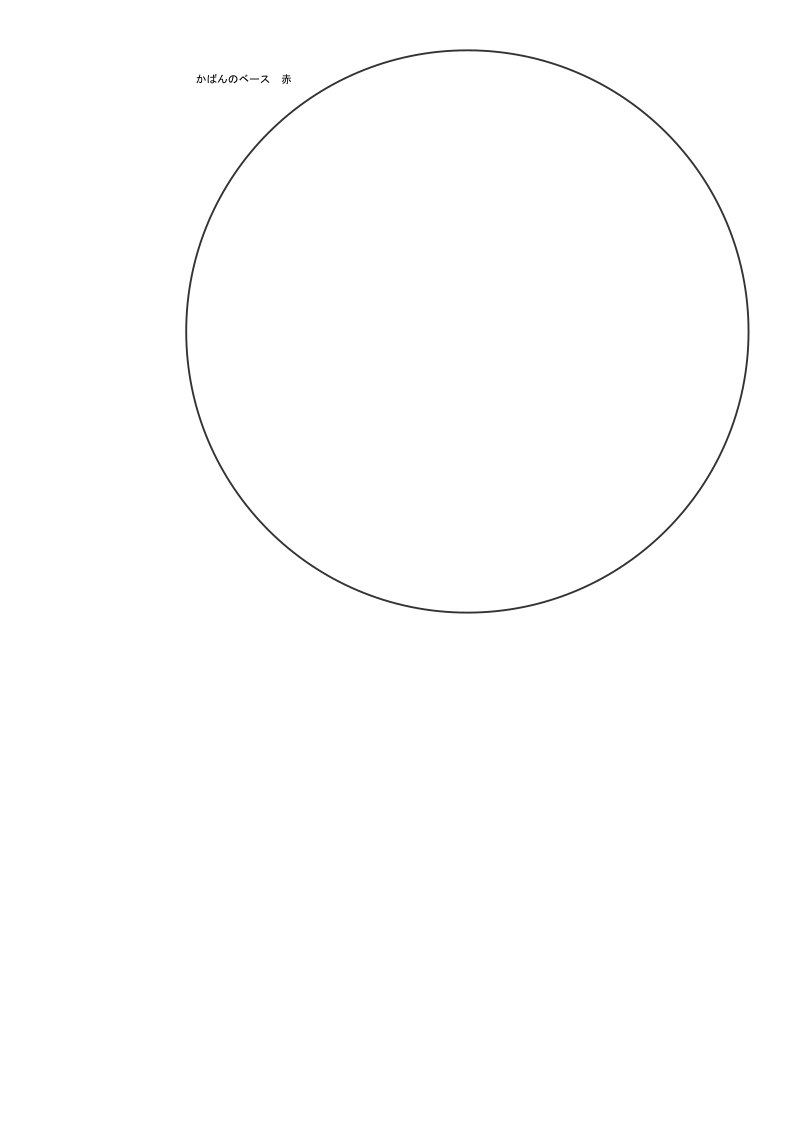
赤の円フェルト1枚の上にサンタの顔を貼り付けます
この順番でくっつけました
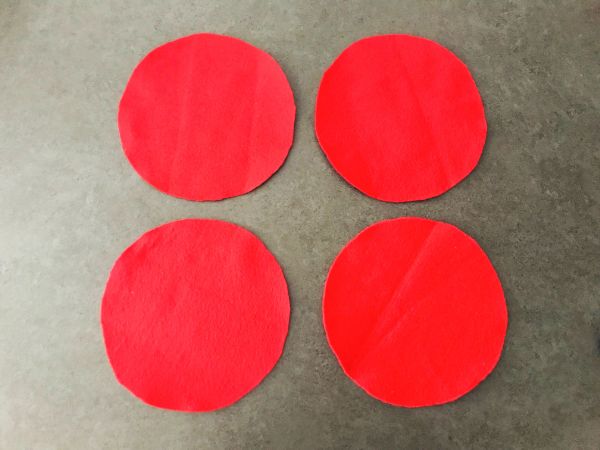
3.バッグをしっかりさせるため、円フェルトを2枚重ねにして厚くする
ボンド か グルーガンがおすすめ!
赤の円フェルトを2枚重ね、貼り付けます
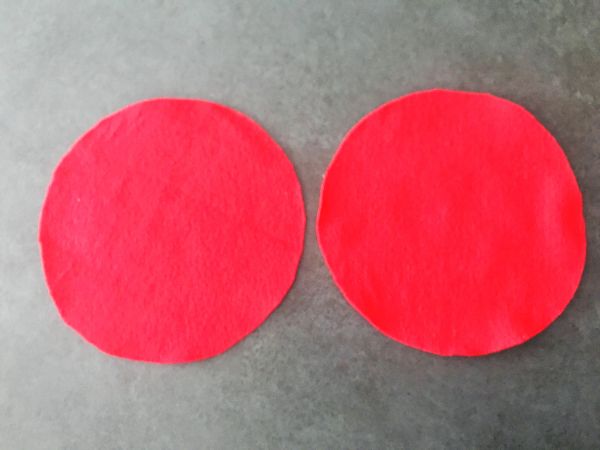
サンタの顔を裏返して、赤の円フェルトを貼り付けます
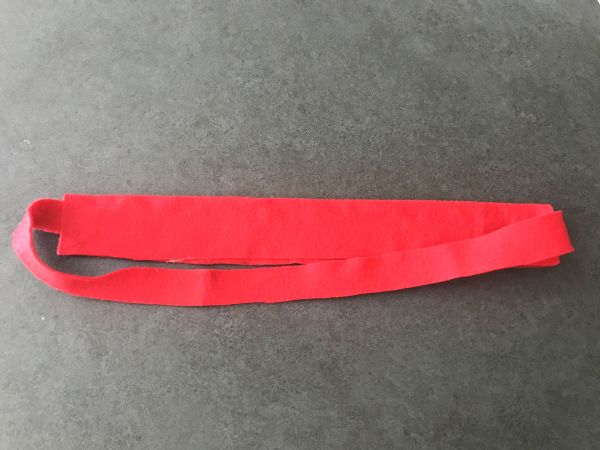
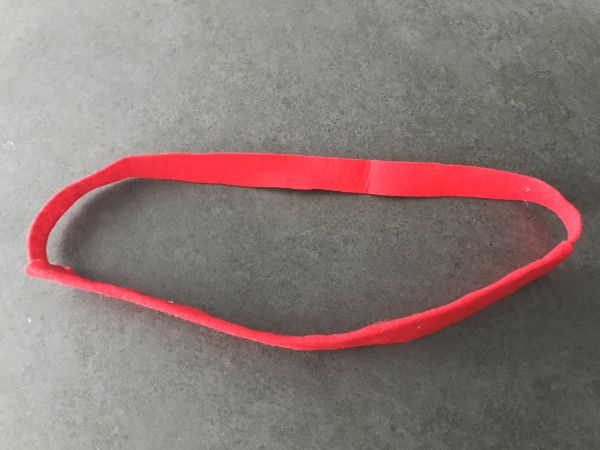
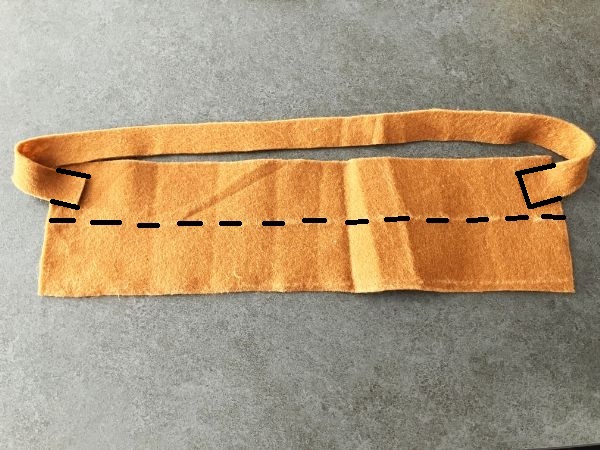
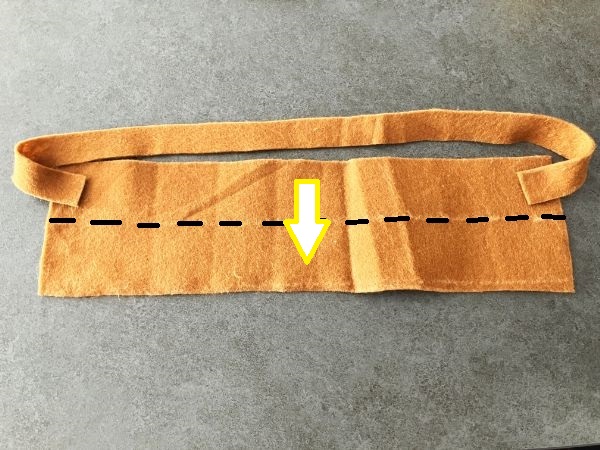
4.側面と持ち手を作る
側面と持ち手のフェルトをくっつけます
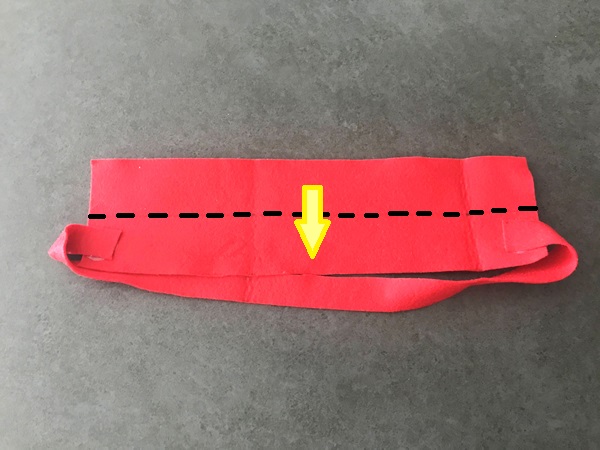
側面を8cmから4cmに折りたたむので、半分より下にくっつけてください
ボンド か グルーガンがおすすめ!
持ち手がねじらないように注意してください

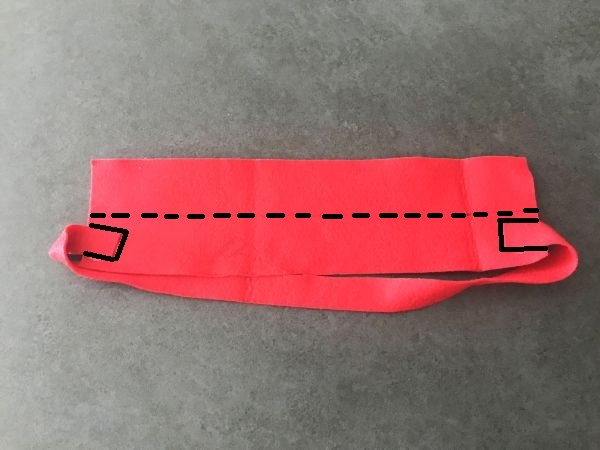
側面のフェルトを折りたたんでくっつけてください
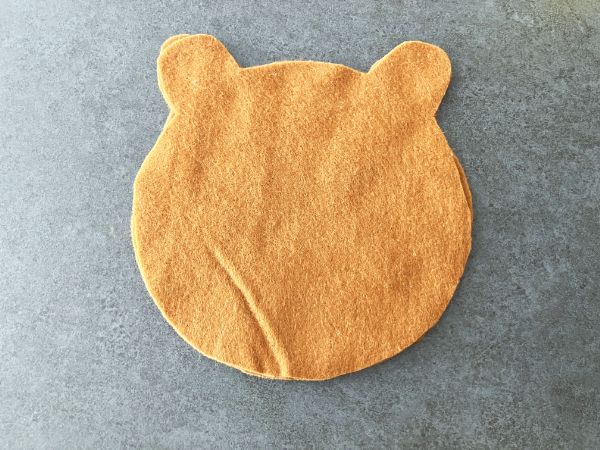
5.バッグの形に作る
ボンド か グルーガンがおすすめ!
(できればグルーガン)
4.で作った側面と持ち手を縦におき、3.で作ったサンタの顔フェルトにくっつけます
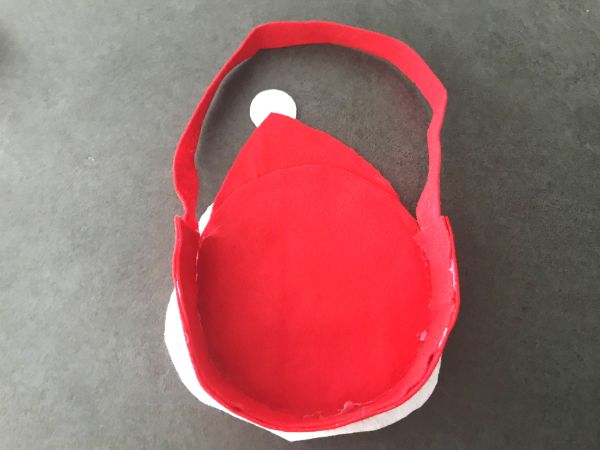
もう片方に円フェルトをくっつけます
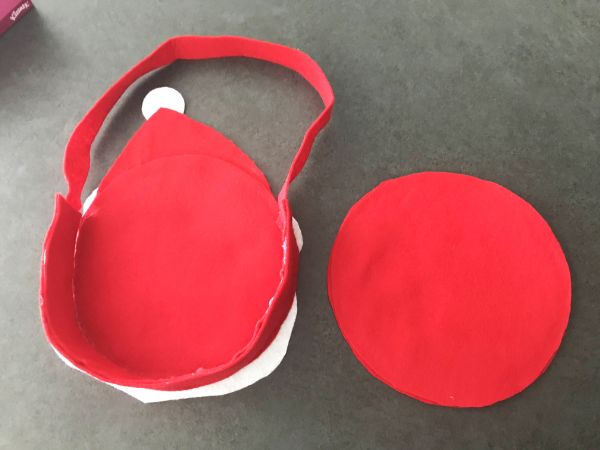
これで完成です
作り方 トナカイ
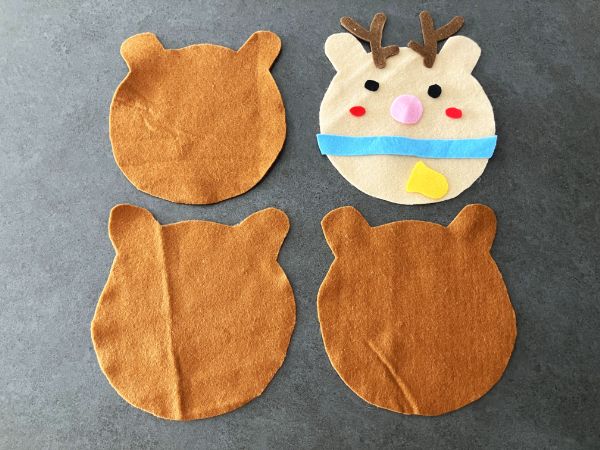
1.フェルトを切る
型紙に合わせてフェルトを切ります
トナカイの顔1枚だけ薄いベージュにした理由は、今のところ薄いベージュの大判フェルトが100均には販売されていませんでした(少なくとも近場では…)
なので、メインの顔だけ薄いベージュにし、残りの3枚は茶色にしました
持ち手と側面のフェルトを切ります
持ち手: 2 × 43cm
側面:8 × 30cm
持ち手は頑丈にしたい場合は2枚切って重ねてくっつけてください
2.顔のフェルトを接着する
布用両面テープ か ボンドがおすすめ!
トナカイの顔を貼り付けて作ります

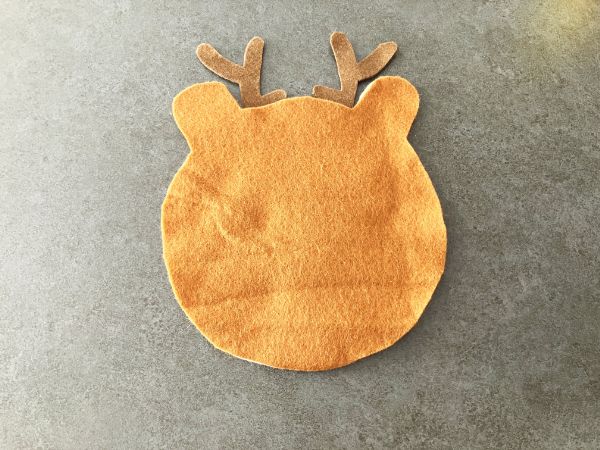
3.バッグをしっかりさせるため、顔フェルトを2枚重ねにして厚くする
ボンド か グルーガンがおすすめ!
顔のフェルトは裏返して、茶色のフェルトを上に重ねてくっつけます
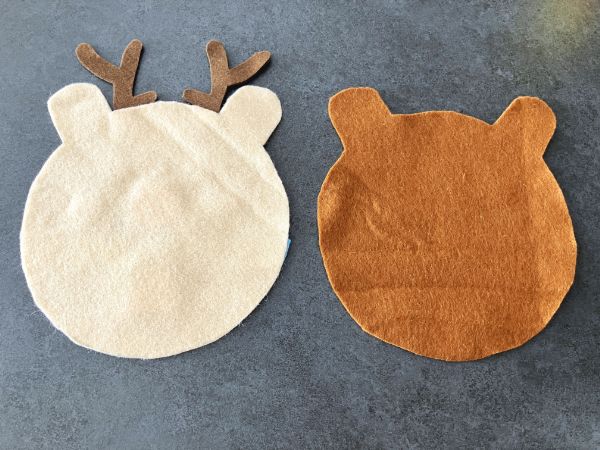
茶色のフェルト2枚を重ねてくっつけます
4.側面と持ち手を作る
側面と持ち手のフェルトをくっつけます
側面を8cmから4cmに折りたたむので、半分より下にくっつけてください
ボンド か グルーガンがおすすめ!
持ち手がねじらないように注意してください
側面のフェルトを折りたたんでくっつけてください
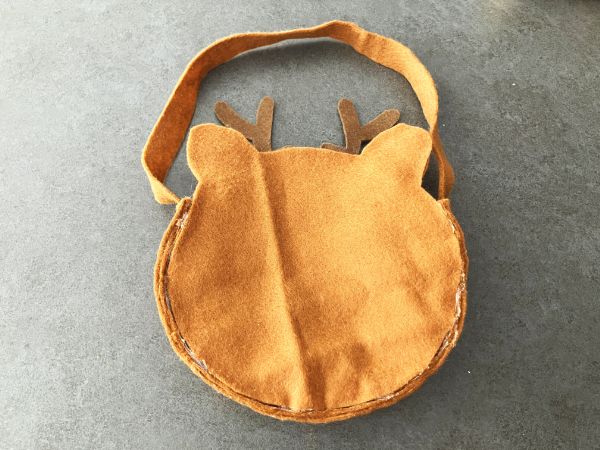
5.バッグの形に作る
ボンド か グルーガンがおすすめ!
(できればグルーガン)
4.で作った側面と持ち手を縦におき、3.で作ったサンタの顔フェルトにくっつけます
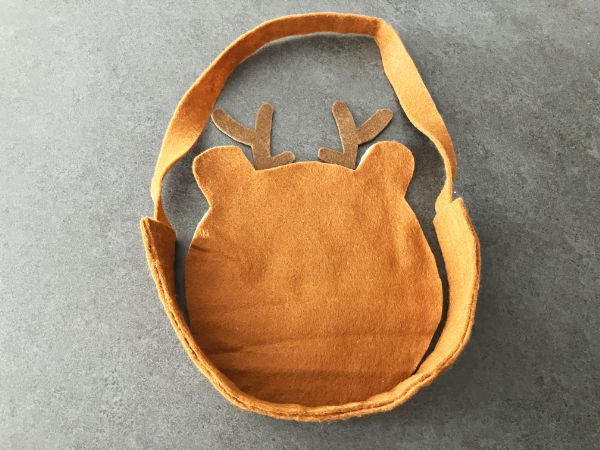
もう片方に円フェルトをくっつけます
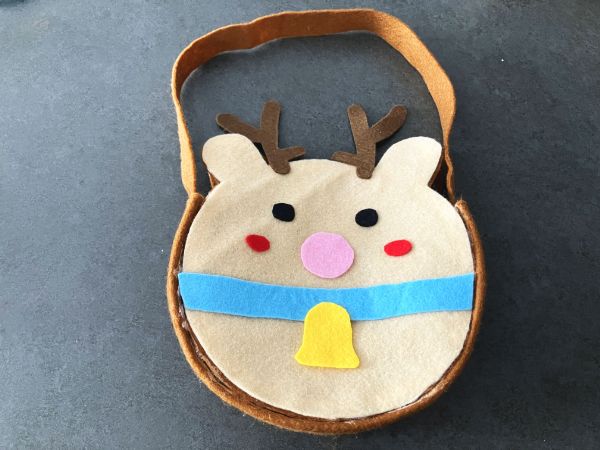
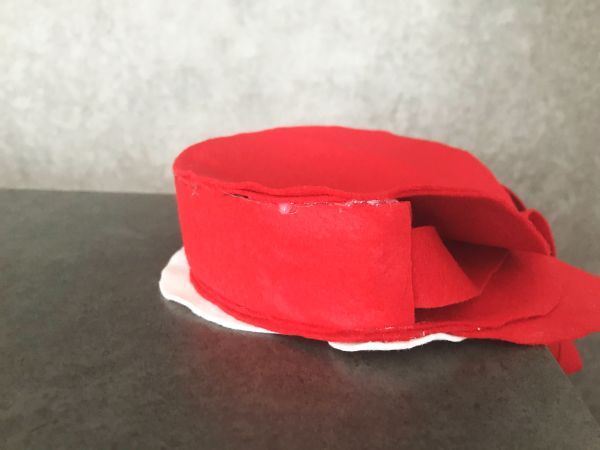
完成
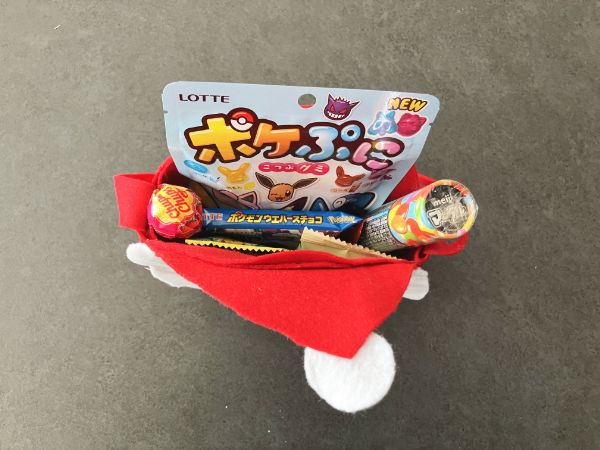
クリスマスらしいラッピングバッグが完成しました
お菓子を入れるとこんな感じです。
良かったら小さいお子様へプレゼントしてみてはいかがでしょうか。